
Storm At Sea Blog Hop And A Wave Of Emotions
- Brianna Roberts

- Nov 16, 2021
- 6 min read
Updated: Dec 8, 2021

As an Island Batik Ambassador we were challenged to make a Storm At Sea Quilt for our November Blog Hop.
A Bit Of History:

I had never heard of the Storm At Sea quilt block before. Truth betold, I have quilted more this year than other years in the past. I learned a lot more about quilting this year. I have really enjoyed it and it has become a welcome addition to my sewing projects.
So what is this Storm At Sea design? Well let's find out. The design uses angles to give the illusion of waves or a wave like motion. Several squares, triangles and diamonds are used to create this optical illusion. I did some reading and found out that this quilt pattern has been around for quite some time but the origin is unknown. It possibly has some ties to a biblical background connected to a bible verse. Who knew? I sure didn't.


Island Batik Fabric Collection:
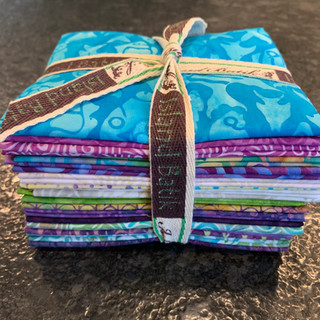
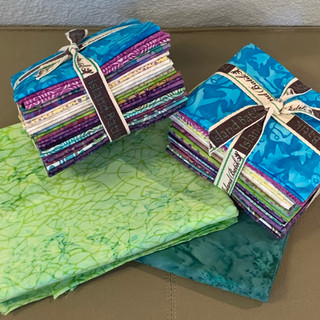
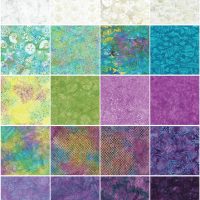
I was given the new Sea Glass collection that was designed by Kathy Engle for Karen Overton of the Quilt Rambler. It will be out in stores this month along with several other new collections. This collection included beautiful colors of purples, greens, blues and different shades of white with shells, sea critters and an ocean theme.
We were tasked to make the Storm At Sea block. I have never done a quilt like this before and to be quite honest, I was terrified. Oh no, how will I accomplish this and can I actually do it?
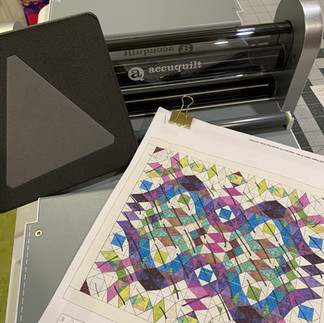
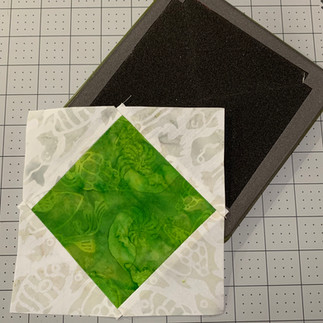
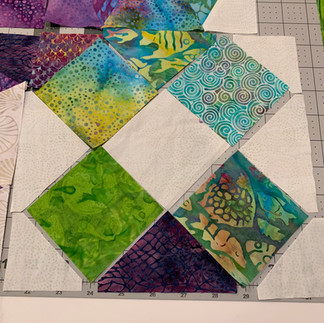
Here I go, full speed ahead! We were given the opportunity to put our own spin on the traditional block and quilt or design our own. I chose to design my own quilt using Electric Quilt software. I wanted an undulating motion but not the typical design of the Storm At Sea block throughout the quilt. I also wanted to design the quilt to have a central point. This is my final design (Shown above in the bottom right picture).
A few minor changes occurred once I started cutting the fabric, but overall the final quilt was pretty much the same except for some color swapping of a few units in the blocks. It was designed to have 8" finished blocks with a total size of 72" x 80".
Now onto cutting the pieces for the quilt blocks. Wholly Guacamole! There are a lot of pieces to be cut. I better get going. My choices were traditional cutting and piecing, paper piecing or using a die cutting system. Because I don't think my piecing or cutting points on triangles are very precise when cutting, I decided to use the proven Accuquilt cutting system for precision. I used several dies to accomplish this task. I did this because it works perfectly in reducing fabric waste, it's efficient and I knew my points would be more precise. It is also a time saver. I also used a 1/4" seam allowance foot (Bernina #57 D).
The Accuquilt system will cut 6 layers of cotton fabric at once. This helped a lot. I had tons of pieces to cut. I better not waste time. So which dies did I use? I used #1(55708), #3(55710), #4 (55711), #5 (55712), #6 (55713), #14 (55754), and #15 (55753). A total of 792 pieces were cut and 72 blocks. Whoa! I am already tired just talking about it. I got started cutting and started piling up fabric pieces as I worked.
I cataloged the colors, shapes and units when prepping to sew the blocks. As you can see in the second top picture below, I used a sharpie marker to cross out blocks as I completed them or cut them. I also used the picture to line up my design.


Now that everything was cut, it was time to sew and sew and sew again. Of course, I had to get the seam ripper out too. It became my best friend although I don't find it to be very friendly. It constantly reminded me of the mistakes I made.

Sewing Tips For Sewing Many Pieces:


Chain piecing: If sewing multiple pieces together that are the same, get them prepped. Sew them one after another likes flags on a pole. Afterward, the thread can be cut in between. This speeds along the process. I pieced my quilt using Aurifil 50 wt thread, Schmetz Microtex 75/11 needles and my BERNINA 570 QEE.
Keep out your seam ripper! You will need it, trust me.
Press seams of multiple units at once, like an assembly line. Going about this in a factory style motion is the way to go. I would press each unit then the blocks and onto each row, etc...

Finally, the top was completed. I had to keep my head on straight with all the color coding, shapes and placement of blocks but man I was excited to see the final product.

What about quilting it? Well, in the past, I have always quilted my own quilts but this time I decided to use a long armer (Sunshine Quilts). I did this because I had a shipping delay issue with some of my Accuquilt dies that did not come in on time. I received them the second week of October when I had ordered them the first week of September. This is not an excuse but I a wanted to be sure my quilt was completed and done for the blog. Kim at Sunshine Quilts did a fantastic job and I am over the moon with the quilted result. I wanted an organic, circular quilted pattern. Hobb's 80/20 cotton batting was used in this quilt too. I then left it up to her and she made spiral circles. I love it. Don't be afraid to get some help if you need it or if you are not interested in quilting a project. Larger projects in particular can be very daunting, exhausting and time consuming to quilt. I then bound it with Island Batiks Foundation Eggshell off white fabric.


I was surprised that I could complete and accomplish this project. I didn't think it could be done. This project scared me back in January when I found out it was the November project. I grew from this experience and am thankful for doing this quilt. I suggest anyone to try something new and stretch your creativity, imagination and skills. Don't worry about the mistakes as they will happen but there is always a learning curve that can be tackled.

Giveaway Time!
I have two giveaways to celebrate this blog hop and Island Batik also has a giveaway too. Yeah! Who doesn't want a chance to win goodies.

Giveaway 1:
Answer this question to be entered for a chance to win three Island Batik fat quarters, two sewing patterns and two spools of thread.
What are you afraid to try in sewing or are scared to try when sewing a new project?
Don't forget to sign up as a member to answer the question in the blog. The winner will be chosen randomly Sunday the 21st of November. The giveaway closes on Saturday, November 20th at midnight EST. The winner will be notified via email.

Giveaway 2:
Go to my Instagram feed: briannaroberts71
Find the giveaway post
Like the post
Follow me on Instagram
Tag a Quilty friend.
A winner will be chosen randomly on Saturday November 20th. The giveaway closes on Thursday, November 18th at midnight EST. The winner will be notified by message on Instagram.

Giveaway 3:
Island Batik is giving away these precuts. Go to their blog page or click here:
The giveaway ends on Friday, November 19th.
Thank you for reading my blog and I want to thank Island Batik and their partners, Accuquilt, Aurifil Thread, Schmetz Needles and Hobbs Batting for sponsoring this blog hop and providing fabric, thread, batting and needles for this project.


All of the other Island Batik Ambassadors have also participated in this blog hop, and they have awesome quilts check out their quilts and the new fabric that they used that is in quilt stores now.
Gail Sheppard, Quilting Gail
Preeti Harris, Sew Preeti Quilts
Pamela Boatright, Pamela Quilts
Jane Hauprich, Stitch by Stitch Custom Quilting
Denise Looney, For the Love of Geese
Megan Best, Bestquilter
Gail Renna, Quilt Haven Threads
Claudia Porter, Create with Claudia
Mania Hatzioannidi, Mania for Quilts
Jennifer Fulton, Inquiring Quilter
Joanne Hart, Unicorn Harts
Connie Kauffman, Kauffman Designs
Jennifer Eubank, Archipelago Quilting
Jennifer Thomas, Curlicue Creations
Janet Yamamoto, Whispers of Yore
Emily Leachman, The Darling Dogwood
Maryellen McAuliffe, Mary Mack Made Mine
Elizabeth DeCroos, Epida Studio
Andi Stanfield, True Blue Quilts
Brianna Roberts, Sew Cute and Quirky
Michelle Roberts, Creative Blonde
Sally Manke, Sally Manke Fiber Artist
Leah Malasky, Quilted Delights
Suzy Webster, Websterquilt


Thank you everyone for participating in the giveaway. I enjoyed reading everyone's comments and thoughts. Stay tuned for another giveaway next year. Happy holidays. trose27 won the giveaway using a random number generator.
Brianna
I have always been afraid to try paper piecing! Everyone tells me it’s easy, but I’m not convinced..lol!! Love this quilt and the colors are stunning!
I am afraid to quilt the projects that I work on. I still haven’t mastered those skills yet. I don’t want to ruin what I just spent so much time making but I am definitely getting better at it. I also have trouble with stitching down binding using machine method. It doesn’t line up well for me on both sides. stitching the first side down is fine but when I turn it around to the other side side the stitching line is off. I have to hand stitch it for it to look nice. i iron the binding really crisp and sharp and pin it in place but it still shifts on me a little even when using my walkin…
I loved working with your fabric collection. The theme was perfect and fitting as I live by the sea. Thank you for your wonderful and kind comments. Being an Island Batik ambassador has been a fantastic experience this year and I have thoroughly enjoyed using these fabrics.
I am afraid/nervous about sewing non-quilt projects such as bags. I have sewn a couple of zipper pouches but none that even have batting in them! I admire my friend who makes the most sleek and stylish bags but I've never attempted them. It's about time I try it, I suppose.